I was surprised by these buckwheat pancakes. They weren't heavy like buckwheat pancakes of my youth. They were softer, moister, and delicious. Jeff had seconds.
Buckwheat pancakes
1 cup ground buckwheat flour (we used Bouchard Family Farm brand)
1/2 cup applesauce
3/4 cup milk
1/2 tsp baking soda
1 tablespoon butter (for flavor - delicious, delicious flavor)
1 or 1 & 1/2 tsp vanilla
Heat your pan to medium on the stovetop (4 was the setting that I used). Combine all ingredients.
I should note - I only intended on adding 1/4 cup of milk in these at first, but the batter was too dry. So, I kept adding. 3/4 cup was the perfect amount.
Mix the ingredients thoroughly. Pour 1/4 cup of batter onto heated pan. Cook & serve like normal pancakes.
Makes 10 half dollar pancakes.
Saturday, December 4, 2010
Monday, October 25, 2010
Let Them Eat Cake
This may be the best cake recipe ever. I love it. Tastes amazing. The Washington Post ran Restaurant Eve's Cake recipe. (Restaurant Eve is this delicious place in Old Town, Alexandria. If you get the chance eat there. There is a great lunch deal, cause the place is not exactly the cheapest.) So this is where it's from. Mix the batter and the icing for a long time. That is the secret.
I made it into a Steeler helmet. Well, I tried really hard. They make it look really easy on TV. It's not so simple. I used 3 pans instead of 2 pans. Using parchment paper makes the cake level when you bake it, instead of that round top that you normally get. I have no idea why.
Ingredients- Serves 12.
8 ounces (2 sticks) unsalted butter, plus additional to grease pans
2 cups sugar
2 1/2 cups flour
1 tablespoon baking powder
1 teaspoon salt
4 eggs at room temperature
1 teaspoon vanilla extract
1 cup milk (may substitute low-fat or nonfat)
Frosting (recipe follows)
Preheat the oven to 350 degrees. Lightly grease and flour two 9-inch cake pans and line the bottoms with parchment paper.
Melt butter and let it cool to room temperature. Combine the sugar, flour, baking powder and salt in the large bowl of a stand mixer. (A stand mixer is preferable for this recipe, though a hand-held electric mixer may be used.) On medium speed, add the butter, incorporating in several additions. Beat for about 2 minutes, or until combined; the texture should resemble cornmeal.
In a separate bowl, combine the eggs, vanilla extract and milk. Add to the flour-butter mixture in two batches (scraping the bowl once), and beat on medium speed for 2 minutes, or until smooth.
Distribute the batter evenly between the two prepared pans. Bake for 35 minutes, or until a toothpick inserted into the middle of the cake comes out clean. Transfer to a wire rack and cool for 20 minutes. Remove cakes from pans to cool completely. Frost the cake. It can stand at room temperature for 1 hour; otherwise, cover and refrigerate until ready to serve.
Frosting
This makes a generous amount of icing, so those with a not-so-sweet tooth may want to reduce the quantities or expect leftovers.
8 ounces (2 sticks) unsalted butter, at room temperature
2 pounds (7 1/2 -8 cups) confectioners' sugar
1 teaspoon vanilla extract
1/2 cup heavy cream, (may substitute whole, low-fat or nonfat milk)
Food coloring (optional)
In a stand mixer on medium speed, beat the butter until fluffy. On low speed, add the sugar in batches, increasing the speed to high after each addition is incorporated. Scrape down the bowl as needed. Add the vanilla extract and cream in a steady stream on low speed until incorporated. Add a few drops of food coloring, if desired. (Restaurant Eve uses red to make pink.) Beat on high speed for 8-10 minutes, until light and fluffy.

Enjoy!
Christine
Saturday, September 4, 2010
Chili Corn Bread
It's been a while--cause I went to Italy on vacation. I highly recommend going to Italy. But all you do is eat. And eat. The food is fabulous, but be prepared.
On an unrelated note, after I moved to the south, I decided to learn how to cook southern food. So I tried a bunch of times to make corn bread (cause it's amazing). Mine was always too dry. So a former co-worker, Donney Bibb gave me a recipe. I love it. To be southern, it has to be a cast iron skillet. Ha ha
3t baking powder
1 c yellow cornmeal
1 c flour
 1/4 c sugar
1 t salt
1 egg
3/4 c milk
1/3 c corn oil
some corn
1 jalapeno
2 chopped green onions
some cheddar cheese, shredded
some red pepper
Pre-heat over to 425 degrees
In a large bowl, combine the first 5 ingredients and mix together. In a separate bowl, beat egg slightly, and blend into mixture. Blend in milk and oil. When well blended, add the remaining ingredients one at a time (batter will be lumpy).
Pour mixture into a cast iron skillet. Bake 30-45 minutes.
Enjoy!
Christine
On an unrelated note, after I moved to the south, I decided to learn how to cook southern food. So I tried a bunch of times to make corn bread (cause it's amazing). Mine was always too dry. So a former co-worker, Donney Bibb gave me a recipe. I love it. To be southern, it has to be a cast iron skillet. Ha ha
3t baking powder
1 c yellow cornmeal
1 c flour

1 t salt
1 egg
3/4 c milk
1/3 c corn oil
some corn
1 jalapeno
2 chopped green onions
some cheddar cheese, shredded
some red pepper
Pre-heat over to 425 degrees
In a large bowl, combine the first 5 ingredients and mix together. In a separate bowl, beat egg slightly, and blend into mixture. Blend in milk and oil. When well blended, add the remaining ingredients one at a time (batter will be lumpy).
Pour mixture into a cast iron skillet. Bake 30-45 minutes.
Enjoy!
Christine
Wednesday, August 11, 2010
Banana (Nut) Bread
My mom gave me this recipe, from Betty Crocker I think. She mostly makes banana nut bread loafs. I use to eat granola bars for a mid-morning snack. But I'm not crazy about the processed food and strange ingredients. So now I make banana (nut) bread as muffins. They are delicious. And a nice portion size.
 2 1/2 C flour
1 C sugar
3 1/2 t baking powder
1 t salt
3 T vegetable oil
3/4 C milk
1 egg
1 c finely chopped nuts (I use steel oats instead)
1 c mashed/riped bananas (2 or 3 medium sized
1/2 c of dried cranberries (optional)
-Preheat over to 300 degrees
-Grease and flour 9x5x3 inch loaf pan (I put muffin liners in 2 muffin pan)
-Measure all ingredients into a bowl (not the dried cranberries)
-beat on medium speed for 1/2 minute, scraping side and bottom of the bowl
-pour into pan (if making muffins, pour half into cups, then add dried cranberries for other half)
-bake 55 to 65 minutes
-remove from pan
-cool thoroughly before slicing
-bake 30 minutes for muffins, makes up to 24 muffins

Enjoy!
Christine
Monday, August 2, 2010
Angel Food Cake Roll
Hi. This is one of my favorite desserts. And everyone loves it. What's better than ice cream? And Angel food cake (though in this instance I use a box mix). I think I got the recipe out of a cooking magazine, but I have no idea which. It has been a long while.
1 Package (16oz) Angel Food Cake Mix
5 t confectioners' sugar
8 oz ice cream (I get a small vanilla from DQ or McDonald's)
1 package instant vanilla pudding mix
3 drops red food coloring (I left it out this time)
Whipping crème
Preheat oven 350 degrees
Line a 15in x 10in x 1 in baking pan with waxed paper. Prepare cake according to package directions. Pour batter into prepared pan. Bake at 350 degrees for 15-20 minutes or until cake springs back when lightly touched. Cool for 5 minutes.
 Turn cake onto a kitchen towel dusted with confectioners' sugar. Gently peel off waxed paper. Roll up jelly-roll style in the towel, starting with a short side.
Cool on a wire rack.
In a bowl, whisk the ice cream, pudding mix, and food coloring. Fold in whipped crème. Unroll cake, spread filling evenly over cake to within 1/2 inch of edges. Roll up. Cover and freeze. Remove from freezer 30 minutes prior to slicing.

If you look closely, you can see the ice cream in the middle of the cake.
Enjoy!
Christine
1 Package (16oz) Angel Food Cake Mix
5 t confectioners' sugar
8 oz ice cream (I get a small vanilla from DQ or McDonald's)
1 package instant vanilla pudding mix
3 drops red food coloring (I left it out this time)
Whipping crème
Preheat oven 350 degrees
Line a 15in x 10in x 1 in baking pan with waxed paper. Prepare cake according to package directions. Pour batter into prepared pan. Bake at 350 degrees for 15-20 minutes or until cake springs back when lightly touched. Cool for 5 minutes.

Cool on a wire rack.
In a bowl, whisk the ice cream, pudding mix, and food coloring. Fold in whipped crème. Unroll cake, spread filling evenly over cake to within 1/2 inch of edges. Roll up. Cover and freeze. Remove from freezer 30 minutes prior to slicing.

If you look closely, you can see the ice cream in the middle of the cake.
Enjoy!
Christine
Sunday, July 18, 2010
Salsa Soup

The basic recipe came from Cookshelf Soup cookbook. I have modified it. You can use any colored peppers. I add additional seasonings, but it's hot stuff that I have on hand. This is enough soup to be my lunch for a entire week. Or I eat it for dinner. Sometimes I have chips or crusty bread with it. Some avocado would also be good.
2 large ears of corn
1-3 T olive oil
2 green peppers
2 jalapenos peppers
1 onion (I use a red one as I like lots of colors)
3 or 4 tomatoes, skinned, chopped
1/2 t chili powder
1/2 t cayenne pepper
1/2 t crushed red pepper
1/2 c water
2 or 3 c low sodium tomato juice
salt and pepper
Boil water. Add tomato and cook for 20 seconds. Take out tomato and skin. Then chop.
Chop the peppers and onion. Cut corn kernels from the cob.
Heat oil in saucepan over a medium-high heat. Add the peppers and cook, stirring briskly for 3 minutes. Add onion and continue cooking 2 minutes.
Add the tomatoes, corn, and chili powder. Continue cooking, stirring frequently, for 1 minute. Pour in the water and when it bubbles, reduce the heat, cover, and cook for an additional 4-5 minutes or until the peppers are tender. Season with salt and pepper.
Transfer mixture to a large container and stir in the tomato juice. Add more chili powder if desired. Cover and refrigerate until cold.

Enjoy!
Christine
Thursday, July 8, 2010
Vegetable Lasagna at the Beach
My wonderful, extended family and some of their friends (27 total) went last week to the Outer Banks on vacation. We rented a huge house ocean front. Everyone takes a turn cooking. Had Thanksgiving dinner/ham/tenderloin one night. Enchiladas another. Grilled hamburgers, hot dogs, and chicken too. Then my turn came up. What better to feed everyone than lasagna. There were actually 3 lasagnas, with a seafood one, and a traditional one. Other talented chefs made those.
I always add a jalapeno to my to make it a bit spicier. Also, all the vegetables ensures leftovers, cause what kid will eat all these? Well, not many kids that were with us. Special thanks to Olivia and Maddie, my little cousins, for helping. (Short of chopping, they did most of the work.)
2 green zucchini chopped
2 yellow squash chopped
1 head of broccoli chopped/box frozen (prepare according to directions)
1 15 oz box of frozen spinach (prepare according to directions)
2/3 tomatoes
1 green pepper chopped
1 yellow or orange pepper chopped
1/2 jalapeno pepper chopped
1 jar tomato sauce
15 oz ricotta cheese
1 package of mozzarella cheese
1 egg
1 package of cooked lasagna noodles
Preheat oven to 350 degrees. After cutting vegetables, put into pan with a little olive oil and heat. Mix the ricotta cheese and egg, along with some mozzarella. Put some sauce on bottom of 9" by 13" pan. Put down 3 noodles across. Then cheese on top of noodles. Put a little pasta sauce on top of the cheese. Use vegetables instead of meat sauce. Repeat until down with ingredients. Cook at 350 degrees for 30 minutes covered. Uncover and cook an additional 20 minutes.

Enjoy,
Christine
Wednesday, June 16, 2010
Kale chips
In our CSA this week, we got 3 bags of fruit & veg. First thoughts? What are we going to do with all of this kale that we're not going to do with all this Swiss chard??
My sister once recommended making kale chips. So, I gave that a try. They were delicious & crunchy & a little salty! All things that I like. The only drawback is that the stalk is still a little chewy after drying.
Here's what I did:
Lay kale on a sheet pan & spray with olive oil/Pam. Sprinkle a little salt over the kale. Bake in a 350 oven for about 10 minutes.
& voila! You have kale chips. Yummy, nutritious, & good for hand-to-mouth repetitions while watching TV/baseball.
Edit: I was just advised to try Indian spices with these. My friend Jaime makes them all of the time!!
- Keri
Tuesday, June 8, 2010
Chicken Pot Pie
Saw carrots, squash, and zucchini at the Farmer's Market so I decided to make chicken pot pie, even though it is not really a summer dish per say. The original recipe comes from "The Heart of Pittsburgh II," A Cookbook from Historic Pittsburgh. I changed it up a bit, added way more vegetables. This is labor intensive, but worth the effort.
Vegetable Chicken Pot Pie
Crust
2 1/2 cups flour
1 t salt
1 t sugar
1/2 chilled butter, cut into 1/2 inch pieces
1/2 chilled shortening, cut into 1/2 inch pieces
5-7 T cold water
Filling
2/3 pieces of boneless chicken
 6 cups low-salt chicken broth
1 pound small red potatoes, quartered
3 carrots, peeled and cut
2 celery, cut
1 head of broccoli or 1 bag
1 squash
1 zucchini
1 bell pepper
1 package of spinach
Sauce
1/4 c butter
2 large shallots, finely chopped
1/2 c flour
1/2 c dry white wine
1/2 c heavy cream
salt and pepper
Butter a 4 quart casserole dish. (I use a 9x13 dish and another smaller one cause I don't have a casserole dish that size.)
For Crust:
Mix flour, salt, and sugar. Add butter and shortening. Blend, using a pastry cutter until it resembles coarse meal. Add the cold water, 1 T at a time, mixing with a fork until dough starts to form a ball. Shape dough into a flat rectangle; cover with plastic wrap, and refrigerate for at least 30 minutes.
For Filling:
Place chicken and broth in a large pot over medium heat. If necessary, add water to cover chicken. Bring to a boil. Reduce heat and simmer, covered for 20 minutes or until chicken is cooked through. Remove chicken to a plate. Add potatoes, carrots, and celery to pot. Add rest of vegetables. Simmer, uncovered for 10 minutes or until potatoes are tender but firm. Using a slotted spoon, transfer potatoes and vegetables to prepare casserole. Cook spinach and if necessary, broccoli. Cut the chicken into 1/2 inch pieces. Transfer to casserole, mix with the potatoes and vegetables.
For Sauce:
 Strain liquid from pot and reserve 4 cups. Skim fat off of top. Using the same pot, over medium heat, melt the butter. Add shallots, saute over medium heat for a few minutes. Add the flour gradually, whisking for 2 minutes. Add the 4 cups of broth and the wine. Bring to a boil, whisking continuously. Add cream, boil for 5 minutes, whisking frequently, until sauce thickens. Season with salt and pepper. Pour 1/2 of the sauce into the casserole, mix well. Add additional sauce to just reach the top of chicken and vegetables. (Do not overfill.)
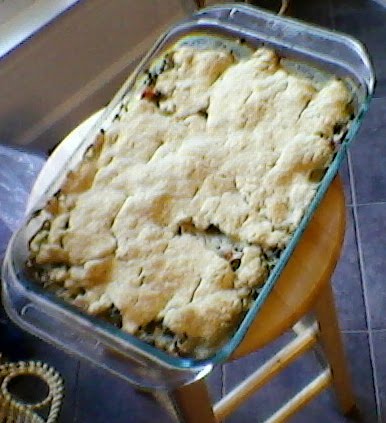
Let mixture cool for 30 to 45 minutes. Preheat over to 400 degrees. Allow chilled dough to soften slightly. On a floured surface, roll dough to 1/2 inch larger than the casserole. Place dough on top. Cut slits in dough to allow steam to escape. Place casserole on a baking sheet for 50 minutes or until sauce is bubbling and top is lightly browned.

Note: Dough may be made up to 2 days ahead; wrap tightly and refrigerate. Filling and sauce may be made 1 day ahead; mix together as instructed. Cover tightly and refrigerate. Do no assemble until pot pie is ready to bake.
8 servings
Enjoy!
Christine
Wednesday, June 2, 2010
Strawberry Pie
Strawberries are my favorite food. I eat them from mid-April until mid-June when I can get them from the Farmer's Market. They are way better from the Farmer's market, at least I think so. Much better flavor and riper. People really love Strawberry Pie. My dad once asked my mom why she didn't make it for him. ha ha The graham cracker crust comes from the Healthy Firehouse Cookbook. Truthfully, I think the crust is why people like the pie. You can also make a similar peach pie, just blanch the peaches in hot water for 30 seconds and take off the skins. I got the basic strawberry portion from the internet, no idea where, but I have modified it.
Graham Cracker Crust:
12 graham crackers, I suggest cinnamon type
6 Tablespoons unsalted butter
Preheat oven 350 degrees. Crush graham crackers. I use a rolling pin and baggie, but you could also use a food processor. Melt butter (about 1 minute in microwave) Mix together. Put mixture in pie pan and form to sides. Cook 8 to 9 minutes. Cool.
Strawberry Portion:
1 quart strawberries (about 4 cups)
1 cup water
1 Tablespoon lemon juice
3/4 cup sugar
3 Tablespoons corn starch
Blend/Puree in blender 1 cup of strawberries, 2/3 cup of water and 1 tablespoon lemon juice. Heat on low heat in sauce pan about 3 minutes. Mix together 1/3 cup of water and 3 tablespoons of cornstarch. Make sure you continuously stir the cornstarch in the water so it blends and there are no lumps. Add the 3/4 cup sugar and cornstarch/water mixture to berry mixture. Stir continuously until it boils. It will be a few minutes. You can turn up the heat a little. Once it boils, take off heat and let cool. Stir it every so often.
Cut up remaining strawberries. Put in pie crust. Pour cool strawberry
gel over strawberries. Serve with whipped cream if you desire. Enjoy!

This is not the greatest picture, but I made this pie after camping (and being tired) for the first time ever and in a tent and before going to a Memorial Day picnic. The pie will gel more after you put it in the refrigerator.
Enjoy!
Christine
Sunday, May 16, 2010
Spring meal: White pizza with ramps & strawberry salad.
From our CSA this week, we received more flavorful salad greens, mustard greens, 2 pints of strawberries, & a bunch of radishes. We hadn't even finished our first set of salad greens yet! Plus, we've had 3 weeks of strawberries. PLUS! We've still have copious amounts of ramps & scallions. What to do!!
So, tonight I made a white pizza with ramps & a strawberry salad. It was a very nice balanced meal. PLUS!! We had a nice white wine with the meal.
Nice.
Just a warning - don't be afraid of the number of ramps. Ramps are much mellower than garlic or scallions/leeks. Don't fear the ramps!
Here's the basic recipe:
White pizza with ramps
10 ramps
1/4 cup parmesan cheese
1 or 3/4 cup shredded Italian cheese (we used Sargento's reduced fat Italian blend)
3/4 cup ricotta cheese
2-3 tablespoons dried basil (or a handful of fresh basil)
1-2 tablespoons dried oregano
1 tomato, diced
1 pizza crust
So, I did a dirty, clever trick with the tomato. I purchased an heirloom tomato from the crappy Giant near me (not the super nice Giant). Mostly, heirloom tomatoes have tons of tomato flavor, which is indicated by their scent & their minimal travel time. However, I screwed up & chose a random heirloom without a good scent that traveled from Canada. After I chopped the tomato, I sprinkled it with a very small amount of sugar & a ton of basil. Then, it tasted more tomatoey. It wasn't perfect, but it was better than tasting like water.
Basically, the pizza crust is topped with ricotta cheese, then 1/2 of the ramps, the seasonings, then the tomatoes, then the shredded cheese. (Jeff says that you can cook all of the ramps in the pizza. I liked a few of them raw on top. But taste a raw ramp & choose your own adventure!) Sprinkle the top with the parmesan. Also, I brushed the exposed crust with some olive oil & sprinkled with some parmesan.
Bake for 30 minutes at 350 degrees. Top the pizza with the rest of the ramps & (if you're feeling feisty, some fresh arugula leaves).
Enjoy with a nice white wine, such as a 2007 Cascina del Pozzo Arneis Roero (Italian white table wine - cheap!). Also, make a nice green salad & top with sliced strawberries & balsamic vinaigrette.
Very Spring-y!
Aside: Ramps are SUPER ULTRA good pan-fried with potatoes. Just add the ramps near the end of the cooking. Nice onion/garlic flavor with potatoes - very good!!
Two Fruit Smoothies from Annette
Judging from the humidity in the air, summer is almost here. And, I had a coupon for frozen fruit...so it's smoothie season. To discuss smoothies, I must explain my love for my Cuisinart Immersion Blender. It was one of the kitchen tools I didn't think I'd use often, yet ended up using all the time! Puree soups....no problem, whip mash potatoes..done, make a smoothie... easy!
 Blueberry & Strawberry Smoothie
Ingredients:
1/4 cup frozen blueberries
1 cup frozen whole strawberries (thawed slightly)
1/4 cup vanilla yogurt (cows milk or soy milk)
1/8 cup (more or less...) milk (cows, rice, soy, almond, hemp, goat... :) )
1/2 Tablespoon ground flax seed
Directions: Toss all ingredients except milk in a tall glass (I used the plastic one that came with the blender). Stick in the blender and blend away. I add a little bit of milk at a time to help it blend and also to get the consistency I want. Enjoy!
Or what about...
 PB & J Smoothie
Ingredients:
1 cup frozen whole strawberries (thawed slightly)
1/4 cup vanilla yogurt (cows milk or soy milk)
1 Tablespoon Peanut Butter
1/8 cup (more or less...) milk (cows, rice, soy, almond, hemp, goat... :) )
1/2 Tablespoon ground flax seed
Directions: Toss all ingredients except milk in a tall glass (I used the plastic one that came with the blender). Stick in the blender and blend away. I add a little bit of milk at a time to help it blend and also to get the consistency I want. Enjoy!

Ingredients:
1/4 cup frozen blueberries
1 cup frozen whole strawberries (thawed slightly)
1/4 cup vanilla yogurt (cows milk or soy milk)
1/8 cup (more or less...) milk (cows, rice, soy, almond, hemp, goat... :) )
1/2 Tablespoon ground flax seed
Directions: Toss all ingredients except milk in a tall glass (I used the plastic one that came with the blender). Stick in the blender and blend away. I add a little bit of milk at a time to help it blend and also to get the consistency I want. Enjoy!
Or what about...

Ingredients:
1 cup frozen whole strawberries (thawed slightly)
1/4 cup vanilla yogurt (cows milk or soy milk)
1 Tablespoon Peanut Butter
1/8 cup (more or less...) milk (cows, rice, soy, almond, hemp, goat... :) )
1/2 Tablespoon ground flax seed
Directions: Toss all ingredients except milk in a tall glass (I used the plastic one that came with the blender). Stick in the blender and blend away. I add a little bit of milk at a time to help it blend and also to get the consistency I want. Enjoy!
Friday, May 14, 2010
Italian Love Affair Soup
Annette here: One of my roommates' from college mom used to make a huge pot of Tortellini Soup and bring it over to us sometimes. It is delicious and very filling. Since I've yet to find gluten free Tortellini and I like to limit the dairy, I used meatballs instead. Also, my visiting brother requested it. So it's not quite Italian Wedding Soup....instead... it's am Italian love affair! Vegetarians, feel free to ignore the meatballs and use the original Tortellini instead. Vegans can do it with vegan Tortellini or just add in more Quinoa for balanced protein. YUM!
 Italian Love Affair Soup
Ingredients:
1 small head of cabbage, chopped
1 Tablespoon Grape Seed Oil (or other medium-high heat oil of your choice)
5-6 stalks of celery, chopped
1 1/2 cups of carrots, chopped
4 cloves of garlic, minced
1/2 teaspoon salt (the Hawaiian red salt is my favorite!)
1 medium onion, chopped
4 green onions, chopped
2 zucchini, chopped
1 15oz can of cannellini beans
1/2 cup Quinoa (just dried....not cooked)
1 28oz can diced tomatoes
Fresh herbs*: basil, oregano, thyme, rosemary, parsley--about 1/2 cup total
2 Tablespoons Italian Seasoning
3 cups water
48oz broth (veggie, chicken or combo)
Optional: 1 package Tortellini
Lots of leftover tomato products! (I used 16oz of tomato soup & 16oz of crushed tomatoes.... the original recipe from my roommate's mom says: "It's now time to clean out your fridge. Anything tomato based you have in there can go in the soup." I have yet to try ketchup....and I'm thinking it's a good idea to stay away from it for this. :) V8 is good in here if you're a V8 drinker.)
* I started growing my own herbs this spring so I have lots of yummy, FREE herbs! It's really easy if you have a sunny spot. You just have to water them. I probably wouldn't go buy a package of all of these...they're expensive. Just use two more Tablespoons of the dried Italian Seasoning.
For the meatballs:
1/2 cup GF Italian bread crumbs (I love Gillian Foods!)
1 pound ground beef (or turkey)
1 egg
1/4 cup chopped fresh parsley (or 1 Tablespoon dried)
Directions for Meatballs
In a medium bowl combine all the ingredients. Roll in to small quarter sized balls and fry in a skillet over medium heat until they become a little browned on most of the sides. DO NOT EAT...they are still raw and will finish cooking in the soup.
Directions for the soup:
Chop, chop, chop lots of veggies. Toss chopped cabbage, onions, carrots, celery, garlic and Grape Seed Oil in a large stock pot. I'm talking large here. Saute until soft, about 15 minutes. Toss in salt, fresh herbs, Italian seasoning, green onions, diced tomatoes, tomato products, broth, and the meatballs. Bring to a boil and then simmer on low heat for an hour or more. The longer and slower you cook it the better it tastes. I cooked my pot today for 4 hours. As your cooking, watch the liquid level. I added about 3 cups of water, but you might want less or more depending on how long you're cooking it. Thirty minutes before calling it done add in the beans, Quinoa, zucchini, and uncooked Tortellini if you're using it. Serve it up with some nice whole grain bread and dinner is served!
For my brother's ranking: tasty, good, so good, SO good, SOOOOO good... this got a SO good!
Thursday, May 13, 2010
Berry Crisp
Keri here with a recipe for a berry crisp. I hope you enjoy!
I read EatingWell's Rhubarb Strawberry Crisp, but I haven't seen any rhubarb at the Farmer's Market yet. Instead, I made a strawberry cherry crisp & modified the recipe a bit.
Keri's Strawberry Cherry Crisp
Filling:
1 lemon
1 pint of strawberries, cored & sliced
10 oz. bag frozen cherries
1/4 cup sugar
2 tablespoons flour or corn starch (I used Jules' Gluten-free flour)
Crisp:
1/2 cup rolled oats
1/2 cup all-purpose flour (I used Jules' Gluten-free flour)
1/2 cup packed light brown sugar
2 tablespoons butter, softened
1 tablespoon canola oil
1-3 tablespoon juice
Preheat oven to 375°F. Toss together fruit, sugar, and 2 tablespoons of flour/corn starch in a large bowl. Juice lemon over fruit mixture. Then, zest 1/2 of the lemon over fruit mixture. Transfer the mixture to a shallow 1 1/2-quart baking dish or deep-dish 9-inch pie plate, pressing down on the fruit to form an even layer.
To make crumble topping: Combine oats, 1/2 cup flour, brown sugar, butter and oil in a bowl; work the ingredients together with a fork or your fingers until the mixture is crumbly. Stir in the juice until the mixture is evenly moistened.
Distribute the topping mixture evenly over the fruit. Bake until the fruit is bubbling and the topping is golden, 35 to 40 minutes.
DELICIOUS! 5/5 stars!!
Sunday, May 9, 2010
Oatmeal Chocolate Chip and Oatmeal Cranberry Cookies

My favorite item in the kitchen is my wonderful, amazing Kitchen Aid mixer. Seriously, everyone should have one if you bake or make lots of doughs. Best purchase I ever made. Below is the Quaker Oats "Vanishing Oatmeal Raisin Cookies" recipe. But I don't really like raisins much, so I make them with dried cranberries instead. I also make half with chocolate chips for Marcie, my favorite sister.* And finally, thanks to my cousin Josie for sharing the secret to great cookies--cake flour instead of regular flour.
Oatmeal Chocolate Chip or Oatmeal Cranberry Cookies
Ingredients:
1/2 Pound of butter, softened (2 sticks)
1 c firmly packed brown sugar
1/2 c sugar
2 eggs
1 t vanilla
1 1/2 c flour (I use cake flour-thanks Josie) (For Gluten Free try Better Batter Flour)
1 t baking soda
1 t cinnamon
1/2 t salt
3 cups oats (For Gluten free use a GF certified rolled oat)
1+ c chocolate chips or
1+ c dried cranberries
Directions:
 Preheat oven to 350 degrees
Beat together the butter and sugars until creamy.
Add eggs and vanilla, beat well.
Add combined flour, baking soda, cinnamon and salt, mix well
Stir in oats and chocolate chips/cranberries, mix well
Drop onto ungreased cookie sheet
Bake 10 minutes or until you likeness
Cool 1 minute and move to wire rack
about 4-5 dozen depending on size.

Enjoy!
Christine
*I do not have a favorite sister--I was just checking to see if they were all reading...
Thursday, May 6, 2010
Watermelon Granita
Okay everyone! Annette here. I'm guessing you're probably wondering what's going on and where I've been. Sorry! The month of April was really busy for me so I've been cooking and taking pictures of it, just not writing it up on here. I have a lot of dinners to catch up on. Also, you might have noticed some other people writing. I opened up the blog to some of my cooking friends so you'll get all kinds of interesting things on here know. Read more about them in the Who's in the Kitchen link on the right.
 We spent Saturday in a cute, historic town nearby I was able to snag this cute blue Ball jar. Some day when my man and I buy a house I want to do an aqua/poppy kitchen so I was excited about my new vase.
What's this have to do with cooking? Nothing. I just thought you might like some flowers. Okay...on to the Granita. I originally got the idea for this from Amy at Simply Sugar and Gluten Free. It was awesome and I want to do it with all kinds of fruit now. So good!
Watermelon Granita
Adapted from Simply Sugar & Gluten Free
 Ingredients:
1 whole seedless watermelon
3 Tablespoons lime juice
1/4 cup sugar (I used Coconut Palm Sugar)
Directions:
Puree your watermelon in a blender/food processor until liquid. Add in lime juice and sugar. Taste to make sure it tastes good to you and add more juice/sugar if needed. Pour into shallow pans and put in freezer. Stir with a fork after a few hours. It might take up to a day to freeze depending on how thick your pan is. Once frozen, scrape with a fork and enjoy. It makes a ton so you can certainly share with others or use less watermelon!
I made mine in a huge Rubbermaid container and then didn't want to spend hours scraping it. I let it thaw for a bit and then was able to break it into chunks and put in the food processor to turn it into a sorbet texture. Either way is fun. Next time I make it I plan to freeze it in smaller containers so I can just dump it in the food processor and grind up. It was so good! My man said he wasn't a watermelon fan but really loved the texture.
It's a great hot, summer day healthy treat. Enjoy! --Annette

What's this have to do with cooking? Nothing. I just thought you might like some flowers. Okay...on to the Granita. I originally got the idea for this from Amy at Simply Sugar and Gluten Free. It was awesome and I want to do it with all kinds of fruit now. So good!
Watermelon Granita
Adapted from Simply Sugar & Gluten Free
 Ingredients:
 1 whole seedless watermelon
3 Tablespoons lime juice
1/4 cup sugar (I used Coconut Palm Sugar)
Directions:
Puree your watermelon in a blender/food processor until liquid. Add in lime juice and sugar. Taste to make sure it tastes good to you and add more juice/sugar if needed. Pour into shallow pans and put in freezer. Stir with a fork after a few hours. It might take up to a day to freeze depending on how thick your pan is. Once frozen, scrape with a fork and enjoy. It makes a ton so you can certainly share with others or use less watermelon!
I made mine in a huge Rubbermaid container and then didn't want to spend hours scraping it. I let it thaw for a bit and then was able to break it into chunks and put in the food processor to turn it into a sorbet texture. Either way is fun. Next time I make it I plan to freeze it in smaller containers so I can just dump it in the food processor and grind up. It was so good! My man said he wasn't a watermelon fan but really loved the texture.
It's a great hot, summer day healthy treat. Enjoy! --Annette
Wednesday, April 28, 2010
Pierogies
From the kitchen of Christine:
 My mother bought me this amazing cookbook "The Heart of Pittsburgh" A Cookbook from Historic Pittsburgh. One of the best recipes is for Pierogies, though time consuming, well worth the effort. I modified the directions and the filling.
Pierogies
Ingredients:
Dough:
2 cups of flour (Use Better Batter if Gluten Free)
1/2 teaspoon salt
1 egg, lightly beaten
1 Tablespoon vegetable oil
1/2 cup very hot water
Potato Filling:
2 cups mashed potatoes
1/2 medium onion finely chopped, sauteed in butter until soft
1/3 pound shredded cheese (I use Boar's Head Cheddar)
Directions:
Put potatoes on to boil. Let boil 10 minutes.
 Dough: Mix the flour and salt. Beat together the egg and oil. Make a well in the flour mixture, and pour egg mixture, and using a fork, begin to mix the dough. Add the hot water; continue mixing until a soft dough forms. On a floured surface, lightly knead dough until no longer sticky. Add flour as necessary. Cover dough with plastic wrap; set aside to rest for 30 minutes.
Mash the potatoes. In a large bowl, combine the mashed potatoes, onion and cheese. Season with salt and pepper.
Put a large pot of water on to boil.
On a lightly floured surface, roll out dough to 1/8 inch thickness. Using a biscuit cutter, or inverted glass, cut dough into 3 or 4 inch circles. Spoon filling into center of each circle. Fold dough in half over top of filling to form a semi-circle. Using wet fingers, dampen the edges and press together to seal. Crimp edges with a fork.*
Working in batches, place pierogies in boiling salted, water. Boil for 4 to 5 minutes. Pierogies will float to top when done. Remove with a slotted spoon. Let sit for a minute or 2.
Heat some vegetable or olive oil in a frying pan. Place 4 or 6 pierogies in pan. Fry until golden brown. Turn once. Serve warm.

*You may freeze pierogies at this time. Put on a cookie sheet and do not let them touch. Once frozen, you can put them in a bag.
Enjoy!
Christine

Pierogies
Ingredients:
Dough:
2 cups of flour (Use Better Batter if Gluten Free)
1/2 teaspoon salt
1 egg, lightly beaten
1 Tablespoon vegetable oil
1/2 cup very hot water
Potato Filling:
2 cups mashed potatoes
1/2 medium onion finely chopped, sauteed in butter until soft
1/3 pound shredded cheese (I use Boar's Head Cheddar)
Directions:
Put potatoes on to boil. Let boil 10 minutes.

Mash the potatoes. In a large bowl, combine the mashed potatoes, onion and cheese. Season with salt and pepper.
Put a large pot of water on to boil.
On a lightly floured surface, roll out dough to 1/8 inch thickness. Using a biscuit cutter, or inverted glass, cut dough into 3 or 4 inch circles. Spoon filling into center of each circle. Fold dough in half over top of filling to form a semi-circle. Using wet fingers, dampen the edges and press together to seal. Crimp edges with a fork.*
Working in batches, place pierogies in boiling salted, water. Boil for 4 to 5 minutes. Pierogies will float to top when done. Remove with a slotted spoon. Let sit for a minute or 2.
Heat some vegetable or olive oil in a frying pan. Place 4 or 6 pierogies in pan. Fry until golden brown. Turn once. Serve warm.

*You may freeze pierogies at this time. Put on a cookie sheet and do not let them touch. Once frozen, you can put them in a bag.
Enjoy!
Christine
Sunday, April 25, 2010
First try: Ravioli
Keri here again with a recipe using my brand new pasta maker! I haven't seen gluten-free raviolis yet... Plus, I doubt that they'll ever have pumpkin, butternut squash, or more creative fillings until many years in the future. This year, the man surprised me with a pasta maker to allow me to create pirogies, raviolis, flavored pastas, etc. Let the creativity begin!
We figured that I'd start with something rather basic for my first ravioli recipe. Now, I want to warn you: This isn't an amazing recipe. It's a first try at making homemade ravioli. It was pretty good, but there's room for improvement.
Firstly, the ravioli filling needs to be almost overwhelmingly flavorful. It needs to be able to stand up to the pasta dough - even though the dough is rolled thin.
Secondly, the dough needed to be rolled with a rolling pin prior to going through the pasta maker. Otherwise, the pasta maker couldn't catch the dough.
After that preface, here are my recipes:
Gluten-free pasta dough
I used Mario Batali's Fresh Pasta recipe as a base. For those of you not doing a gluten-free pasta, feel free to use his instead of mine.
4 eggs
3 1/2 cups Jules' Gluten-free flour mix
1/2 cup water (more or less)
Mound the flour in the center of a large wooden cutting board. Make a well in the middle of the flour, add the eggs. Using a fork, beat together the eggs and begin to incorporate the flour starting with the inner rim of the well. As you incorporate the eggs, keep pushing the flour up to retain the well shape.
Start kneading the dough with both hands, primarily using the palms of your hands. If the dough has trouble coming together, add 1/4 cup water. Keep adding water until it becomes a cohesive mass. Gluten-free flour tends to be thirsty, but be sparing after the first 1/4 cup of water. If you overdo it, the pasta maker will shred the dough into little pieces. (Hint: If this happens - just add a little more flour, knead again, & re-roll.)
Remove the dough from the board and scrape up any left over dry bits. Lightly flour the board and continue kneading for 3 more minutes. The dough should be elastic and a little sticky. Continue to knead for another 3 minutes, remembering to dust your board with flour when necessary. Wrap the dough in plastic wrap and set aside for 20 minutes at room temperature. (Hint: Keep most of the dough wrapped until needed.)
Roll 1/4 of the dough with rolling pin until 1/4-1/8 inch thin. Feed through pasta roller at largest setting. Then, feed through pasta roller at the ravioli setting. Cut sheet into large rounds. Add a very small dollop of ravioli into the center of a round. Wet the outer edge of the round. Top with another round & press down gently to seal. You can use a fork to flute the edges if you're feeling crafty. (Hint: If the dough tears, use a dough "band-aid." Wet a small bit of dough, & gently press into the tear. Boiling the pasta makes most of these look fairly normal. Plus, there's sauce, right??)
When done with the prep work, boil the raviolis until they float. Top with sauce, & Done!!
Ravioli filling
1/2 lb. ground pork
1/2 cup ricotta cheese
8 leaves fresh basil, chopped
2 tablespoons dried Italian seasoning
2 tablespoons olive tapenade (optional)
1 teaspoon garlic powder
1 teaspoon red pepper flakes
Cook pork on stove top until browned. Remove from heat, & place pork into large mixing bowl. Add ricotta, basil, seasoning, & tapenade. Taste. Add salt & pepper. Add more flavorings as needed. If you need, add other/more seasonings - Remember: It should be almost overwhelmingly flavorful.
Sauce
1/4 cup grape tomatoes, quartered
1/4 cup diced roasted red peppers plus 1 teaspoon liquid from jar
2 tablespoons finely chopped sundried tomatoes plus 1 tablespoon oil from jar
3 leaves fresh basil, chopped
Mix all ingredients. Taste. Add salt/pepper. Done!

(This item was cross-posted to Twice If It's Nice.)
Saturday, April 24, 2010
Food & Wine Steak with Herb Nut Salsa
Keri here with a review of a recipe and wine pairing!
Tonight, the man & I had steak with an herb nut salsa. The recipe came with our Food & Wine Adventurer Club wine shipment.
Aside: Food & Wine introduced two wine clubs last Fall/Winter: a collector edition & an adventurer edition. They ship us 6 bottles with a recipe booklet that pairs each wine with a primary recipe (& 3 alternates). Some wineries also do the same, which is pretty awesome.
The wine was really good for a cheapy wine, & it paired really well with the recipe. Good job, Food & Wine!!
Wine: Domaine de Baumard - Logis de la Giraudière - 2005. Fancy name for a red table wine... but it is really nice. Don't pay over $20 for it. Rating: 3.5/5
 Recipe: Hanger Steak with Herb Nut Salsa Rating: 3.5/5
The salsa was salty herby goodness - So, I made very simple sides: roasted potatoes & onions with very little salt & some pepper and halved grape tomatoes with leftover herbs, basil, & shallot. Both cleansed the palate nicely after bites of the steak/salsa & sips of the wine. We made a few minor modifications: no tarragon, no chervil, anchovy paste in lieu of anchovies, less oil.
Also, ignore the recipe's note about 12 minutes for toasting the hazelnuts. Toast until fragrant, & don't wander away. Otherwise, it's a mad dash to open the door, turn on the fan, & cover the smoke detector.
Overall, the dish was very good together. We will probably make this again when the vegetable & herb garden is in full force. I recommend the wine & recipe together as a semi-fancy meal.
(This item was cross-posted to Twice If It's Nice.)
Wednesday, April 14, 2010
Granola Goodness
In my quest to find a granola made with gluten free oats I decided to make my own. I found this recipe on Allrecipes.com but added my own changes to make it a bit healthier and sugar free. However, this recipe uses a few controversial ingredients. Scientists and nutritionists are continually making changes on what "healthy" means. After growing up with the "It's okay! It's Fat Free" of the 80s and then the "Anything Low-Carb" of the 90s and 2000s, I've become a huge fan of the Michael Pollan's school of thought and just my general idea that things are okay in moderation provided that it's something natural as opposed to derived from science. (Not that I'm against science by any means! Go Darwin!) So bring on the controversial ingredients featured in the granola:
 Coconut Oil: Killed in the press in the 1980s because of it's high saturated fat content and because of the over processed version, coconut oil is regaining popularity because some believe that it's actually good for you. Search online and find articles about this tasty oil (and fruit and milk...) and make up your own mind.


Coconut Palm Sugar: This recipe is the first time I've ever cooked with this sweetener but I'm starting to experiment with it as a sugar alternative. Really any sweetener in large quantities is bad for most of us humans so I try not to eat too much of my drug of choice. However, I'm trying to find the best one and this on has good reputation.
 Agave Nectar: This sweetener caused major controversy in the land of "fru-fru" sweeteners. First it was the wonder sweetener, then it was bad, then it was good, and now....who knows? So, again, I use it in moderation. I know that when I eat things made with it, I want more of the baked good later but I don't CRAVE it like I do when I eat thing made with regular, old sugar.

Ground Flax Seeds: Okay, no one has a problem with this one these days but I have heard/read that it's best to eat these freshly ground and not to cook them. So, if you want the most Omega 3's from these tiny seeds, buy them whole and ground them yourself then sprinkle them on the just out of the oven granola.
Are we done with the theory? Let's get on to the tastiness! Be aware...this makes a ton and it's also delicious! Gluten Free Friends--you might want to start off slow and work your way up to a real portion of this because sometimes even gluten free oats are a bit much for our tummies to take on.Granola Goodness
Adapted from Megan's Granola
Ingredients

- 8 cups rolled oats
- 1 1/2 cups Quinoa Flakes
- 1/2 cup ground flax seeds
- 1/4 cup sunflower seeds
- 1 cup sliced almonds
- 1 cup finely chopped pecans
- 1 cup finely chopped walnuts
- 1 1/2 teaspoons salt
- 1/4 cup palm sugar
- 1/4 cup agave nectar
- 1/2 cup honey
- 1/4 cup molasses
- 2/3 cup coconut oil
- 1 tablespoon ground cinnamon
- 1 tablespoon vanilla extract
- 2 cups raisins or sweetened dried cranberries
Directions
- Preheat the oven to 325 degrees F. Line two large baking sheets with parchment paper.
- Combine the oats, quinoa flakes, sunflower seeds, almonds, pecans, and walnuts in a large bowl. Stir together the salt, palm sugar, agave nectar, honey, oil, cinnamon, and vanilla in a saucepan. Bring to a boil over medium heat, then pour over the dry ingredients, and stir to coat. Spread the mixture out evenly on the baking sheets.
- Bake in the preheated oven until toasted, about 20 minutes. Stir once halfway through. Once out of the oven sprinkle on the ground flax seeds and stir. After about 20 minutes out of the oven it will become crispy. Cool, then stir in the raisins or cranberries before storing in an airtight container.
Friday, April 9, 2010
No-Picture Thai Chicken Stir-Fry with Coconut Rice
That's right.... I committed the cardinal sin of blogging. I have no picture of this. However, it was delicious so I should share it with you. I'll have to update this post in the future when I make this again. For some reason I procrastinated on making this dish. The ingredients sat in my fridge for over a week. They were just about to start getting bad when I finally realized I was stalling because I didn't want to eat stuffed cabbage rolls. Stir Fry! Problem Solved.
Thai Chicken Stir-Fry with Coconut Rice
Inspired by: Thai Chicken in Cabbage Leaves
(pg. 276) 2009 Cooking Light Annual Recipes
Ingredients:
1 pound boneless/skinless chicken breast, cut into strips
 1 red pepper, sliced into strips
1/2 cup shredded carrots
1 napa* cabbage, sliced into strips
1 sliced red onion
1 lime
3 Tablespoons chopped fresh mint
1/4 cup fresh chopped cilantro
4 teaspoons Thai Fish Sauce
1 Tablespoon Dark Sesame Oil
1 bunch chopped green onions
crushed peanuts (optional)
*It's Chinese Cabbage...not wine country!
Directions:
(If making the Coconut Rice...start that before cooking the stir-fry.)
In a large-ish skillet with large sides (or a wok if you have one!) toss in the chicken, juice from the lime, fish sauce, and sesame oil. Cook over medium heat until chicken is mostly done. Then toss in the sliced red pepper, carrots, onions, cabbage and cook until chicken is finished and vegetables are tender. Take off the heat and mix in the mint, green onions, crushed peanuts, and cilantro. Server over rice.
Coconut Rice
Ingredients:
1 1/2 cups brown jasmine rice
1 can coconut milk (you can go low fat if you want but there are rumors that coconuts are actually good for you! :) )
Directions:
Cook rice as directed on your package or toss into a rice cooker* except instead of 3 cups water, use the coconut milk. I also added about 1/4 cup of water just to thin it out a bit. When it's tender, serve with the stir fry. This also tastes amazing with a little spritz of lime juice.
*My man got ours free from Coke Reward Points! Thank you fellow office workers obsessed with their cokes! I would highly recommend getting a little $20 rice cooker if you're a big fan of rice dishes. It makes it so easy.
Vegetarian/Vegan Option: Take out the chicken and fish sauce and instead use a little soy sauce, tofu or shelled edamame, extra veggies like mung bean sprouts/more peppers/broccoli/water chestnuts... play around with it and have fun.
Thai Chicken Stir-Fry with Coconut Rice
Inspired by: Thai Chicken in Cabbage Leaves
(pg. 276) 2009 Cooking Light Annual Recipes
Ingredients:
1 pound boneless/skinless chicken breast, cut into strips

1/2 cup shredded carrots
1 napa* cabbage, sliced into strips
1 sliced red onion
1 lime
3 Tablespoons chopped fresh mint
1/4 cup fresh chopped cilantro
4 teaspoons Thai Fish Sauce
1 Tablespoon Dark Sesame Oil
1 bunch chopped green onions
crushed peanuts (optional)
*It's Chinese Cabbage...not wine country!
Directions:
(If making the Coconut Rice...start that before cooking the stir-fry.)
In a large-ish skillet with large sides (or a wok if you have one!) toss in the chicken, juice from the lime, fish sauce, and sesame oil. Cook over medium heat until chicken is mostly done. Then toss in the sliced red pepper, carrots, onions, cabbage and cook until chicken is finished and vegetables are tender. Take off the heat and mix in the mint, green onions, crushed peanuts, and cilantro. Server over rice.
Coconut Rice
Ingredients:
1 1/2 cups brown jasmine rice
1 can coconut milk (you can go low fat if you want but there are rumors that coconuts are actually good for you! :) )
Directions:
Cook rice as directed on your package or toss into a rice cooker* except instead of 3 cups water, use the coconut milk. I also added about 1/4 cup of water just to thin it out a bit. When it's tender, serve with the stir fry. This also tastes amazing with a little spritz of lime juice.
*My man got ours free from Coke Reward Points! Thank you fellow office workers obsessed with their cokes! I would highly recommend getting a little $20 rice cooker if you're a big fan of rice dishes. It makes it so easy.
Vegetarian/Vegan Option: Take out the chicken and fish sauce and instead use a little soy sauce, tofu or shelled edamame, extra veggies like mung bean sprouts/more peppers/broccoli/water chestnuts... play around with it and have fun.
Wednesday, April 7, 2010
Fagioli
About a year ago I downloaded a pdf of The Vegan Culinary Experience--Dairy Free Italian but never really cooked from it. The other day I opened it up and picked out this recipe to make for dinner. An hour before dinner I read the recipe more carefully and because of time and my desire to eat carrots & celery... made some major modifications...and came up with this:
 Here's the original recipe:
The Vegan Culinary Experience – Education, Inspiration, Quality * www.veganculinaryexperience.com February 2009
Recipe by Chef Jason Wyrick
Fagioli
Type: Main Dish, Italian (Tuscan) Serves: 4
Time to Prepare: 1 hour 45 minutes
Ingredients
1 yellow onion, chopped
2 celery stalks, chopped
2 carrot, chopped
3 cloves of garlic, smashed
2 bay leaves
4 cups of water (should reduce to 2 cups)
1⁄2 cup of tomato paste
2 cloves garlic, minced
1 tbsp. of chopped sage leaves
2 tbsp. of olive oil
1⁄2 tsp. of salt
1⁄2 tsp. of freshly ground pepper
3 cups of cannellini beans, rinsed
1 bunch of spinach, chopped
4 slices of Tuscan (or other Italian) bread, toasted
Instructions
Chop the onion, celery, and carrots and smash the garlic.
Simmer the onion, celery, carrot, garlic, and bay leaves in the water for about 40 minutes.
Drain and reserve the liquid, discarding the veggies.
Mince the 2 cloves of garlic.
Chop the sage.
Mix the liquid with the tomato paste, garlic, sage, olive oil, salt, and pepper.
Mix the tomato sauce you just made with the beans.
Place this in a baking dish and cover it.
Bake it on 400 degrees for 45 minutes.
While the beans bake, wilt the spinach leaves in a dry pan over a medium heat.
Once the beans are done, mix the spinach in with them.
This should be served with a side of Tuscan toast.
Here's what I did:
Quick Fagioli
Ingredients:
1 yellow onion, chopped
2 celery stalks, chopped
2 carrot, chopped
3 cloves garlic, minced
1 14oz can of plain tomato sauce
1/2 cup water
2 tbsp. of olive oil
1⁄2 tsp. of salt
1⁄2 tsp. of freshly ground pepper
3 cups of cannellini beans (white kidney beans), drained & rinsed
1 bunch of spinach, chopped
Directions:
Chop the onion, celery and carrots (or use the food processor to do it for you like I did). Adding olive oil, sautee the veggies and the garlic over medium heat in a pan until soft. Pour into a casserole dish. Add the tomato sauce, salt, pepper, water, drained beans, and Italian Seasoning. Cover and cook in the oven on 400 degrees for 45 minutes. Wilt the spinach leaves in a pan over medium heat and add to the bean mixture when it comes out of the oven. Serve with some GF bread sticks.
Easy Gluten Free Bread Sticks
Follow the directions on the back of the Bob's Red Mill Gluten Free Pizza Crust. However, instead of rolling it into a pizza crust, flour your hands and roll them into bread sticks. I put them on a baking sheet, drizzle some olive oil and dump tons of garlic powder and Italian Seasonings on top. Bake in the oven at 425*F for 15-18 minutes. YUM! (Just looked at the top picture closer and realized I ran out of time to make bread sticks. Instead we had this baguette. Don't want to confuse you if you're bread sticks don't look like the picture!)
 We also ate this meal with a quick Strawberry Salad--Red leaf lettuce, sliced strawberries, pecans, olive oil, balsamic vinegar*, and a quick grind of pepper.
*If you're a balsamic vinegar fan like I am you might find this very disappointing....

The Vegan Culinary Experience – Education, Inspiration, Quality * www.veganculinaryexperience.com February 2009
Recipe by Chef Jason Wyrick
Fagioli
Type: Main Dish, Italian (Tuscan) Serves: 4
Time to Prepare: 1 hour 45 minutes
Ingredients
1 yellow onion, chopped
2 celery stalks, chopped
2 carrot, chopped
3 cloves of garlic, smashed
2 bay leaves
4 cups of water (should reduce to 2 cups)
1⁄2 cup of tomato paste
2 cloves garlic, minced
1 tbsp. of chopped sage leaves
2 tbsp. of olive oil
1⁄2 tsp. of salt
1⁄2 tsp. of freshly ground pepper
3 cups of cannellini beans, rinsed
1 bunch of spinach, chopped
4 slices of Tuscan (or other Italian) bread, toasted
Instructions
Chop the onion, celery, and carrots and smash the garlic.
Simmer the onion, celery, carrot, garlic, and bay leaves in the water for about 40 minutes.
Drain and reserve the liquid, discarding the veggies.
Mince the 2 cloves of garlic.
Chop the sage.
Mix the liquid with the tomato paste, garlic, sage, olive oil, salt, and pepper.
Mix the tomato sauce you just made with the beans.
Place this in a baking dish and cover it.
Bake it on 400 degrees for 45 minutes.
While the beans bake, wilt the spinach leaves in a dry pan over a medium heat.
Once the beans are done, mix the spinach in with them.
This should be served with a side of Tuscan toast.
Here's what I did:
Quick Fagioli
Ingredients:
1 yellow onion, chopped
2 celery stalks, chopped
2 carrot, chopped
3 cloves garlic, minced
1 14oz can of plain tomato sauce
1/2 cup water
2 tbsp. of olive oil
1⁄2 tsp. of salt
1⁄2 tsp. of freshly ground pepper
3 cups of cannellini beans (white kidney beans), drained & rinsed
1 bunch of spinach, chopped
Directions:
Chop the onion, celery and carrots (or use the food processor to do it for you like I did). Adding olive oil, sautee the veggies and the garlic over medium heat in a pan until soft. Pour into a casserole dish. Add the tomato sauce, salt, pepper, water, drained beans, and Italian Seasoning. Cover and cook in the oven on 400 degrees for 45 minutes. Wilt the spinach leaves in a pan over medium heat and add to the bean mixture when it comes out of the oven. Serve with some GF bread sticks.
Easy Gluten Free Bread Sticks
Follow the directions on the back of the Bob's Red Mill Gluten Free Pizza Crust. However, instead of rolling it into a pizza crust, flour your hands and roll them into bread sticks. I put them on a baking sheet, drizzle some olive oil and dump tons of garlic powder and Italian Seasonings on top. Bake in the oven at 425*F for 15-18 minutes. YUM! (Just looked at the top picture closer and realized I ran out of time to make bread sticks. Instead we had this baguette. Don't want to confuse you if you're bread sticks don't look like the picture!)
 We also ate this meal with a quick Strawberry Salad--Red leaf lettuce, sliced strawberries, pecans, olive oil, balsamic vinegar*, and a quick grind of pepper.
 *If you're a balsamic vinegar fan like I am you might find this very disappointing....
Subscribe to:
Posts (Atom)


